This music player unlocks a whole new world for mobile audiophiles, including a 10 band equalizer, greatly expanded file support, and a somewhat customizable interface. Ever since Gingerbread days till now, Poweramp continues to be the most powerful music player for Android and has a huge fan following.
What works well on Poweramp
The interface is somewhat similar to the stock music app, but it unlocks several new features for advanced playback that should meet just about any need you might have on your phone or tablet. For example, instead of just using a long, nested set of commands, you can give quick commands like swiping to navigate playlists quickly.

Oh how wonderful the file support is. While listening to FLAC files on your mobile device is a little silly when you think about it (as most phones don’t have a good digital to analog converter chip), being able to equalize your music while listening on the go is fantastic if your music tastes vary. If you have great headphones to match, this is a fantastic way to bring out the best in your music when you’re on the go. As another plus, this app doesn’t seem to chew through as much battery as other music players do.
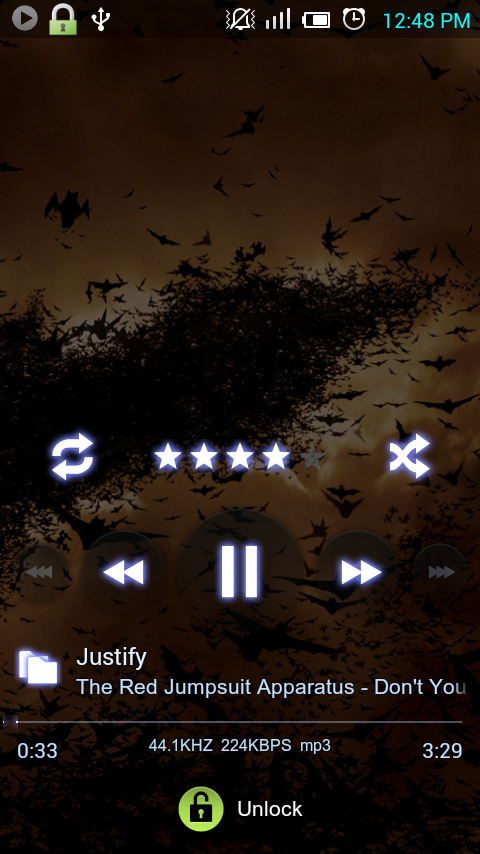
Lock Screen
Interface and Features
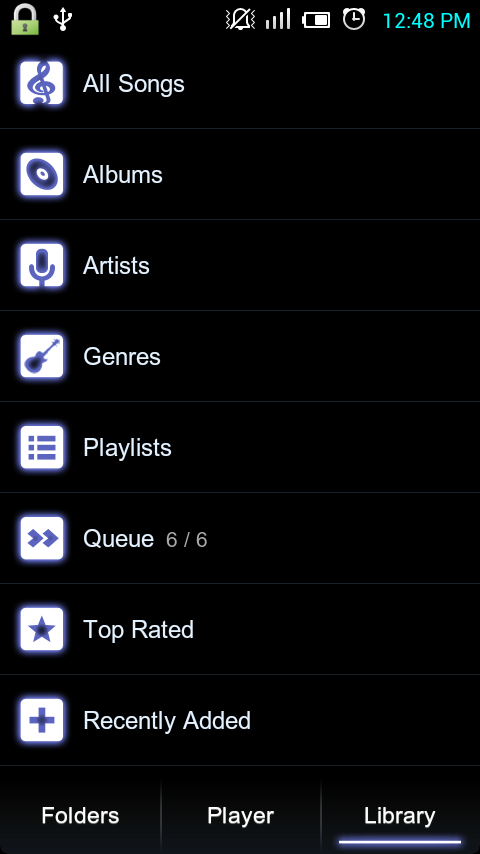
Once installed, you’re presented with a clean and easy to use interface. The UI is extremely novice-friendly giving you oversized media . Your music can be sorted according to the usual artist, album categories or you can choose folder view, which shows you all your music the way you have copied it on your phone. Tapping on this takes you to the playlist from where you can switch folders. The album art area also houses the shuffle and repeat toggle buttons along with a five star rating system.
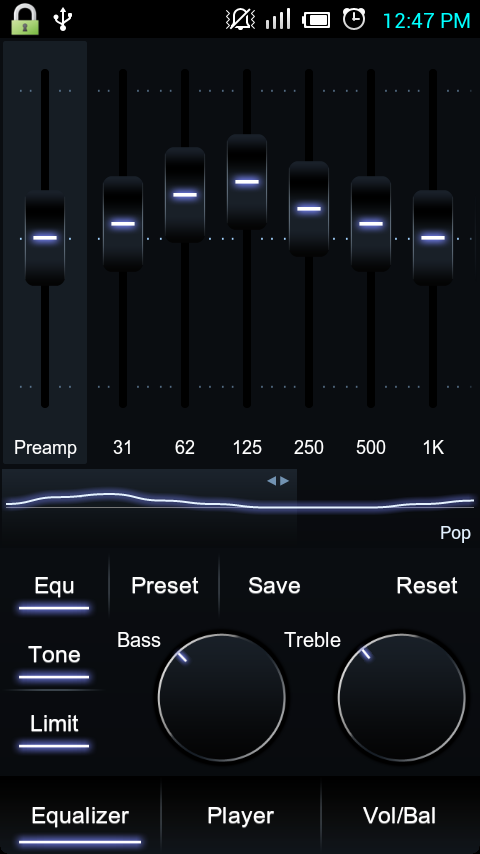
What makes Poweramp one of the most sought after music player is the long list of audio formats supported. The list includes mp3, mp4/m4a (including alac), ogg, wma, flac, wav, ape, wv, tta, mpc, aiff, which covers pretty much every format you can find audio in these days. The ability to customise the sound is also very extensive. We start off with a 10-band graphic equaliser that can be used to fine tune your music depending on what genre of songs you listen to the most. There are plenty of presets as well and you can also use the sound enhancements (like Dolby or HTC FX) that come with some phones in Poweramp. Besides that, you also have the option to adjust the bass and treble separately along with a volume limiter. You can also add extra effects like Stereo eXpansion, mono mixing and adjust the balance. Every change you make is noticeable provided you have a good pair of headphones. Other features include support for crossfading, gapless playback, queuing system, ability to update missing album art and even download lyrics of the song through the musiXmatch plugin.
Pros & Cons:
Pros
- One of the best fully featured Android music players
- Features equalizer for custom or premade presets
- Super slick user interface with themes
Cons
- Cannot play Podcasts
Performance
With the right pair of headphones, the audio quality is really good and beats any other player in the market. The equaliser and or audio effects make a huge impact on the audio quality and you can actually make out the difference between mp3 and flac files. One neat feature is the ability to parse .cue and m3u files. If you download radio shows, especially trance music, you’ll often come across one single file that’s an hour long. Cue and m3u files help breakdown this singular file into individual tracks so you can skip to the one you want without having to split the track physically. Gapless playback support is also present for albums that feature it.
 You also get plenty of widgets for your homescreen to choose from, including a very nice lockscreen widget. You can customise the amount of information to be displayed on the lockscreen widget too, from album art to equaliser controls. Poweramp also gives you the option to change the theme. You get a bunch of them by default and you can even install third party themes from the Play Store. One feature that we feel should be added is a social component. Apps like MixZing allow you to play your music from your library as well as search for trending tracks around the globe. You can even see what your friends are listening to at the moment and rate songs so your friends can find them.
Verdict : Worth the download?
If you want to milk a better audio experience out of your mobile device and don’t want to carry around all sorts of unnecessary clutter like external amps in your pocket, this app is a good way to start consolidating your devices into one unit. Poweramp is available for as little as Rs129 for the full version, which makes it extremely good value. The app is compatible with Android v2.1 and upwards and is constantly being updated with bug fixes and support for the latest version of Android. If you have an Android phone and want to experiment with its audio, Poweramp is the most popular audio app in the Play Store for a reason and we strongly suggest you ditch the stock player for Poweramp.
Get it on Play Store