Create shortcut to modify registry files and add custom context menu

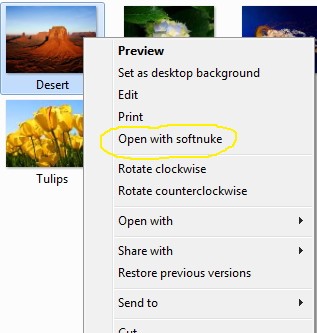
Have you ever wanted to create a shortcut which would speed up your registry editing skills ? or do you modify registry more frequently ? Here is a solution which will perform any task in less than 5 seconds. We will explain this tutorial by adding a custom option in windows Right Click Context Menu of a file. [Not Folder]

  • First, we’d launch Notepad or another text editor.
  • Next add this line at the top of file.

“Windows Registry Editor Version 5.00”

  •  After it add a blank line.
  • To create a key Directory in registry, add full path of it.

[HKEY_CLASSES_ROOT\*\shell\Open with Softnuke\command]

  • Now add name of key and its value in this format “”=”value”, value could be path of any file with which you want to open.

@=”notepad.exe %1”

  • %1 is used here to provide path of the specified file on which Right click is to be done and @ means default key in directory.

registry-shortcut-open-with-softnuke

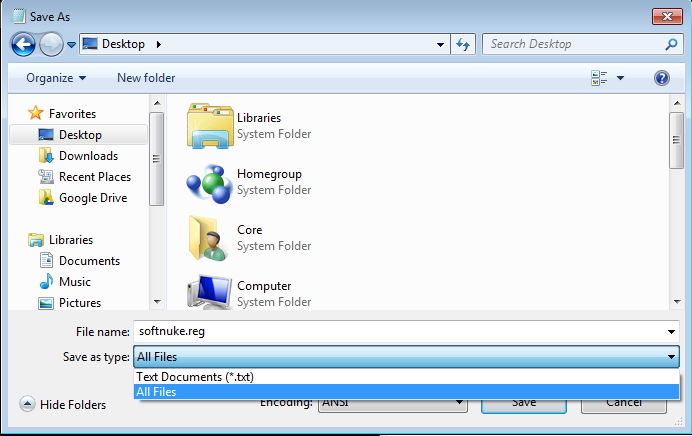
  • Now save it as “softnuke.reg”. Always Save the file with the .reg file extension. You can double-click it to add the information to your registry.

A single .reg file can contain multiple entries, so you could have one .reg file that installs all your favorite shortcuts.

registry-shortcut-save

Now can use it the way you like, here is another example : Enable/Disable access of USB

Windows Registry Editor Version 5.00 [HKEY_LOCAL_MACHINE\SYSTEM\CurrentControlSet\services\USBSTOR\] “Start”=dword:4
  • Finally, to delete the folder and all its continents create a .reg file similar with (-)minus sign in front of its directory.
Windows Registry Editor Version 5.00 [-HKEY_LOCAL_MACHINE\SYSTEM\CurrentControlSet\services\USBSTOR\] “Start”=-

For any Queries please comment below.

registry-shortcut-context

Note: Users running earlier versions of Windows may want to substitute Windows Registry Editor Version 5.00 with REGEDIT4.

How to Change the Logon Screen of Windows 7

How would you like to change the logon screen background in Windows 7 so as to give your Windows a customized look and feel? With a small tweak it is possible to customize the Windows 7 logon screen and set your own picture/wallpaper as the background.

Changing logon screen background in Windows 7 is as simple as changing your desktop wallpaper. Well, here is a step-by-step instruction to customize the logon screen background:

  1. The image you need to set as the background should be a .jpg file and its size should not exceed 245KB, it can be smaller.
  2. The image resolution can be anything of your choice. However I prefer 1440 x 900 or 1024 x 768. You can use any of the photo editing software such as Photoshop to compress and set the resolution for your image. Once you’re done, save this image as backgroundDefault.jpg. (Rename it, otherwise it won’t work)
  3. You will need to copy this image to the following location:
    C:\Windows\system32\oobe\info\backgrounds

    You will need to create that path if it does not already exist on your computer.

  4. Now, open the Registry Editor (Start -> Run -> Type regedit) and navigate to the following key:
    HKLM\Software\Microsoft\Windows\CurrentVersion\Authentication\
    LogonUI\Background

    If the key Background does not exist, then right-click on LogonUI, select New -> Key, and then name it as Background.

    Now locate OEMBackground (listed on the right side). If it does not exist, right-click Background and selectNew -> DWORD and name it OEMBackground.

    Win7Logon-Registry


  5. Double-click on OEMBackground and set the Value Data to 1.
  6. Now log-off to see the new logon screen background. If you would like to revert back to the default background, just set the Value Data back to 0.